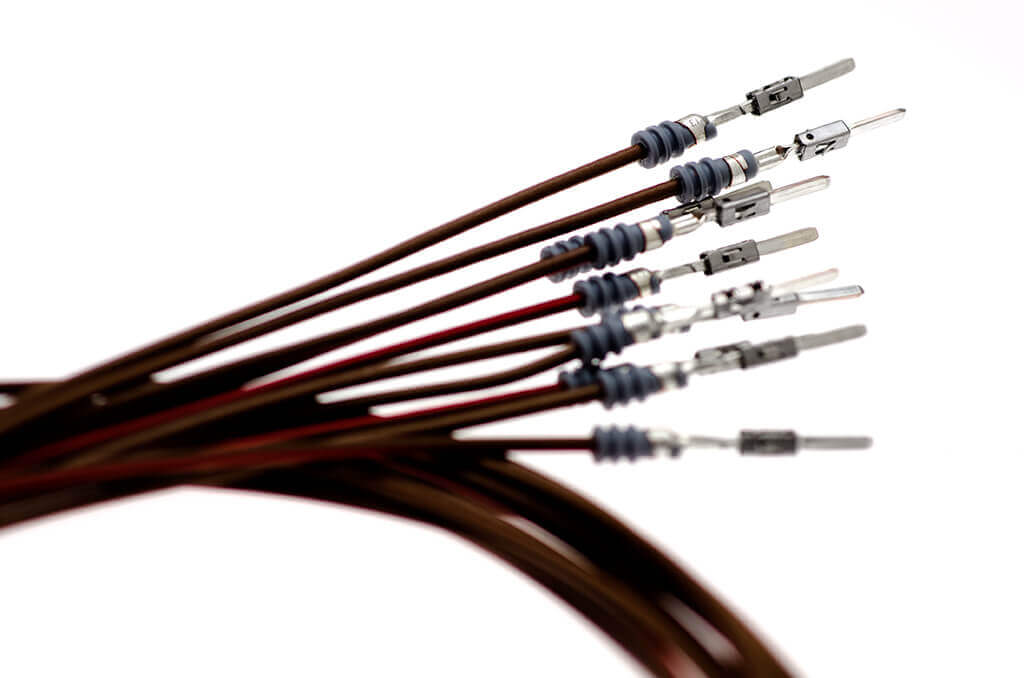
Connector pins play a crucial role in the automotive industry. To meet the demands of the automotive industry, terminals and connectors must be of suitable quality. For use in the automotive industry, terminals and wires are joined by the crimping process.
After the end of the crimping process, a quality inspection is required to ensure that the terminal produced is of sound quality, in line with the demands of the automotive industry.
In this guide, we will present the criteria for judging the quality of the terminal crimp.
Contents
What is Crimping?
Crimping refers to joining two or more metals by deforming or bending the metals. Crimping technology was developed as a replacement for solder terminations. It allows us to create high-quality connections between terminals and wires. The three key components required for a crimping process are:
- Terminal
- Wire
- Tooling
During the terminal crimping process, the core part of the wire is crimped with the insulating part. The crimping of these two parts looks different in appearance and position. While the core wire crimp ensures a robust connection between the wire and the terminal, the insulation crimp reduces the vibration in the terminal.
Before we discuss the criteria for judging the quality of the finished crimp, let us first understand the anatomy and structure of a terminal.
Anatomy of a Terminal
Usually, a terminal consists of three parts:
- Plug in Area: The plug-in area is where an opposite terminal can be connected to the terminal. If the plug-in area is deformed during the crimping routine, this will impact the performance of the automotive connector terminal.
- Transition Area: The transition area is located in the middle of the terminal. The part also contains a contact lance. If the position of the lance is changed during the crimping process, it can impact the performance of the automotive connector.
- Crimping Area: As the name suggests, this is the part of the terminal where all the crimping work is done. This part contains a conductor crimp and an insulation crimp.

Quality Inspection Criteria for Judging Terminal Crimping
There are four ways to evaluate the quality of your finished terminal crimps. For optimum inspection results, all four methods may be applied:
1. Visual inspection
2. Crimping height detection
3. Crimping section analysis
4. Pull force measurement
1. Visual Inspection Guide
A lot can be detected by merely visually inspecting the finished crimped terminal. Here are the four main parts of the terminal to pay attention to when visually inspecting the finished crimp:

- Wire Conductors: When visually inspecting the quality of your terminal, you need to ensure that the wire conductor strands are visible and protruding. You should also check and ensure that the visible length of the conductor strands does not exceed 1mm.
- Insulation Section: You also need to ensure that the insulation’s end is also visible after the crimping process. The best-suited position for insulation is to be in the middle of the terminal.
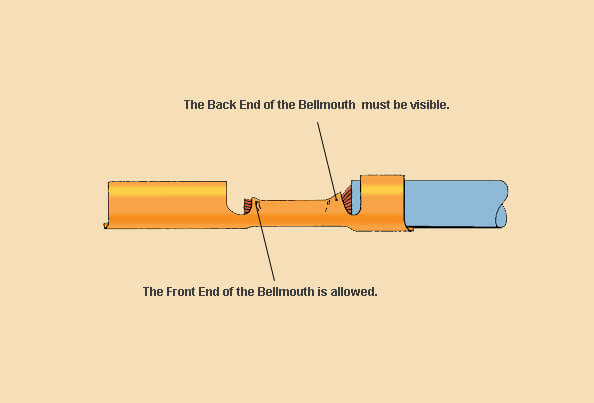
- Bellmouth Structure: After the end of the crimping process, you need to make sure that the back end of terminal’s crimping area has a bellmouth structure present. The length and size of the bellmouth structure can vary depending on the size of the wire chosen.

| Conductor cross-sectional area | The length of the bellmouth |
| 0.03-0.35 mm² | 0.25 ±0.15mm |
| > 0.35-1.0 mm² | 0.3 ±0.15mm |
| > 1.00-2.5 mm² | 0.4 ±0.2mm |
| > 2.5-6.0 mm² | 0.6 ±0.3mm |
| > 6.0-25.0 mm² | 1.0 ±0.5mm |
| > 25.0-50.0 mm² | 1.5 ±0.8mm |
- Cut-Off Tabs: When visually inspecting the quality of your finished crimp, you need to check whether the cut-off tabs are visible. The length of the cut-off tab should be 1.0 to 1.5 the thickness of the terminal material.
Here are some additional things to look for when visually inspecting the crimping quality of the terminal:
- The terminal body is not deformed
- The seal is not damaged
- All strands are deformed
2. Crimping Height Detection Guide
The next thing to look for during a quality inspection is the height of the crimp chosen. The crimping height of the conductor needs to be continually controlled during production. The diameter of your wire will determine the allowable crimping height of your conductor. Most terminals are designed to accommodate multiple wire sizes.
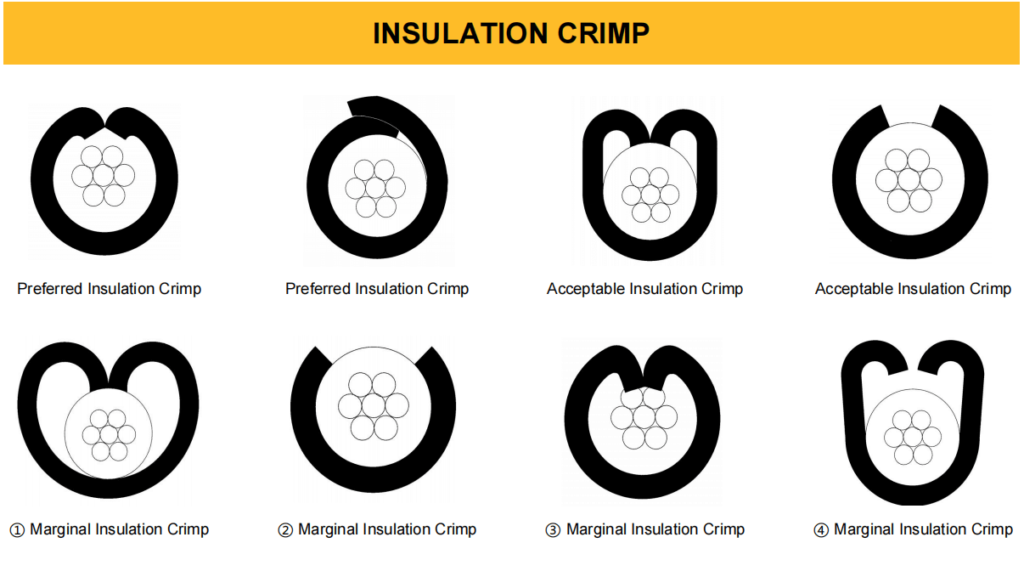
Crimping height detection is a quick and non-destructive method for judging the quality of the finished crimp. Remember that the insulation diameter does not need to fully surround the wire for optimum working. If you are working with large insulation, it should firmly grip at least 88% of the wire.
On the other hand, if the diameter of the wire chosen is small, the insulation should firmly grip at least 50% of the wire, including the top portion. To do the crimping height inspection, cut the wire flush with the back of the terminal.

| Problem | Cause | Solution |
|---|---|---|
| ① Terminal contacts less than 50% of a small diameter wire | Too much terminal insulation barrel | Evaluate terminal |
| ② Terminal surrounds less than 88% of a large diameter wire | Crimp too loose, not enough terminal insulation barrel | Tighten insulation crimp height Evaluate terminal |
| ③ Insulation crimp barrels cut through insulation into conductor strands | Crimp too tight | Adjust insulation crimp height |
| ④ Insulation not firmly gripping insulation, fails bend test | Crimp too loose | Adjust insulation crimp height tighter |
3. Crimping Section Analysis Guide
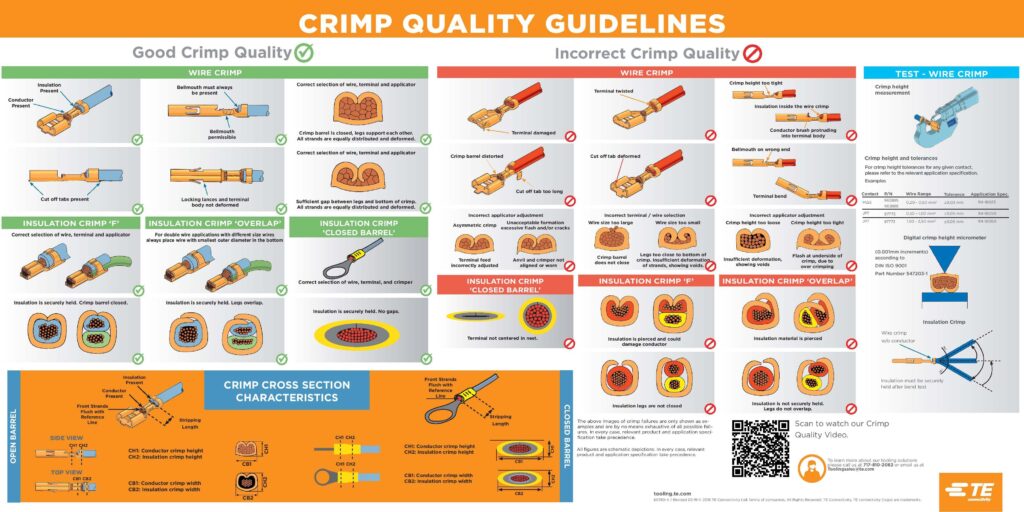
For this analysis, you need to cut out a terminal section. Cut the section vertically from the middle of the conductor crimping area while avoiding the serration part. The section of the crimp you cut should have the following properties:
- A closed crimp barrel
- Wings that support each other
- Sufficient gap between the wings and the bottom of the crimp
- Equally distributed and deformed strands
If the cross-section of the wire you cut meets the above criteria, it’s optimal for the automotive industry. Here are some following conditions to avoid:
- Open wings with an exposed conductor
- Wings that penetrate the floor of the terminal
- Wings that are folded back
- Lack of strand compaction

4. Pull Force Measurement Guide
A pull force test is done to evaluate the mechanical properties of your finished terminal crimp. Pull force measurement will allow you to detect any problems in the crimping process, such as incorrect crimp height and lack of bellmouth structure. Here are the test values for a pull force measurement:

We hope that this gives you a clear idea of terminal crimping quality inspection criteria. For more information, read other blogs on our website.


